Dye penetrant testing, also known as liquid penetrant inspection (LPI), is a widely used non-destructive testing (NDT) method that helps inspectors detect surface flaws in materials. This technique involves applying a special dye to the surface of an object, which seeps into any cracks or discontinuities. After allowing time for the dye to penetrate, the excess is removed, and a developer is applied to draw the dye out, making defects visible. This method is also commonly referred to as dye penetrant inspection (DPI), liquid dye penetrant testing, or simply penetrant testing (PT). Throughout this guide, we will use the terms "dye penetrant" and "liquid dye penetrant" interchangeably, as they are essentially the same thing. As a non-destructive testing method, dye penetrant testing allows inspectors to examine materials without causing damage or altering their structure. It's particularly useful in industries where the integrity of the material must be preserved, such as aerospace, automotive, and manufacturing. [Dye penetrant NDT is just one of the many non-destructive testing (NDT) methods used by professionals. For more information on NDT, check out this detailed guide.] Dye penetrant testing is a simple yet effective way to find surface defects such as cracks, porosity, and leaks. The process relies on capillary action, where the dye flows into tiny openings on the material’s surface. Once the dye has had time to penetrate, it is removed from the surface, and a developer is applied to highlight any flaws. This method is especially popular for inspecting non-porous materials like metals, plastics, and ceramics. It is often used to examine components such as welds, castings, forgings, plates, bars, and pipes. Inspectors look for various types of defects, including:
The origins of dye penetrant testing can be traced back to the early 1900s when it was first used in the railroad industry. Initially, the oil and whiting method was employed, where oil was applied to the surface and then covered with chalk. Any oil that seeped into cracks would be revealed by the chalk, helping identify potential issues. Over time, the method evolved with the addition of colored dyes, making defects more visible and easier to detect. Today, dye penetrant testing is a standard practice across many industries due to its simplicity and cost-effectiveness. One of the main advantages of dye penetrant testing is its affordability and ease of use. It doesn’t require expensive equipment, making it accessible for many inspection teams. However, like any testing method, it has its limitations. Pros: Cons: The dye penetrant test typically follows six key steps to ensure accurate results: Before applying the dye, the surface must be thoroughly cleaned to remove dirt, oil, or any other contaminants that could interfere with the test. Common cleaning methods include solvent wiping, vapor degreasing, or mechanical cleaning like grinding or brushing. A specialized penetrant is applied to the surface, usually by spraying or brushing. The penetrant is left to dwell for a set period—typically 5 to 20 minutes—depending on the product and the material being tested. After the dwell time, the excess penetrant is wiped away using a dry cloth. A remover may also be used to ensure no residue remains on the surface. A white developer is applied to the surface. The developer draws the penetrant out of any cracks or flaws, making them visible to the inspector. Once the developer is in place, the inspector examines the surface under normal or ultraviolet light, depending on the type of penetrant used. Visible dye penetrants can be seen under regular lighting, while fluorescent penetrants require UV light for visibility. After the inspection, the surface is cleaned to restore it to its original condition. This step is important to prevent any residual chemicals from affecting the material or future inspections. Inspectors have several options when selecting penetrants, removers, and developers. Each choice can be combined with others, except for dry powder, which is incompatible with color contrast penetrants. Penetrant Options: Remover Options: Developer Options: The choice depends on factors such as the material type, surface size, and complexity. Selecting the right combination ensures optimal performance and accurate results. While dye penetrant testing is relatively low-cost and easy to perform, it is still governed by strict standards, especially when used in regulated industries. These standards ensure consistency and reliability in the testing process. Some of the most widely recognized standards include: For more details on these standards, you can visit the official websites of the organizations listed below: Electric Tricycle,Canopy Cab Electric Scooter,Ce Certificated Electric Tricycle,Low Speed Electric Trcicyle YUMBOMOBILITY LTD , https://www.yumbomobility.comWhat Is Dye Penetrant Testing?
What Is Dye Penetrant Testing?
The Pros and Cons of Dye Penetrant Examination
Procedure for a Dye Penetrant Test
1. Clean the Surface
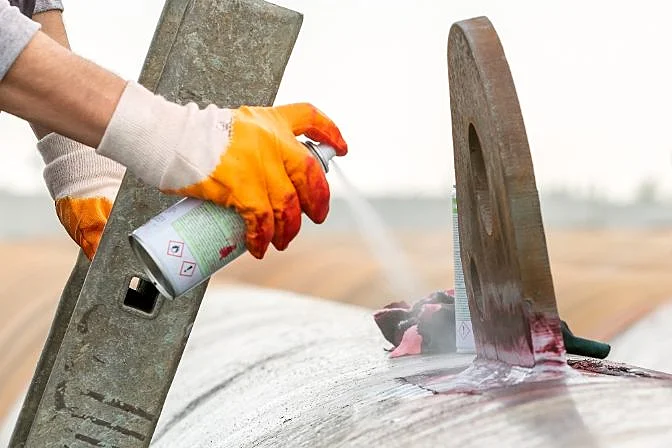
2. Apply the Dye Penetrant
3. Remove Excess Penetrant
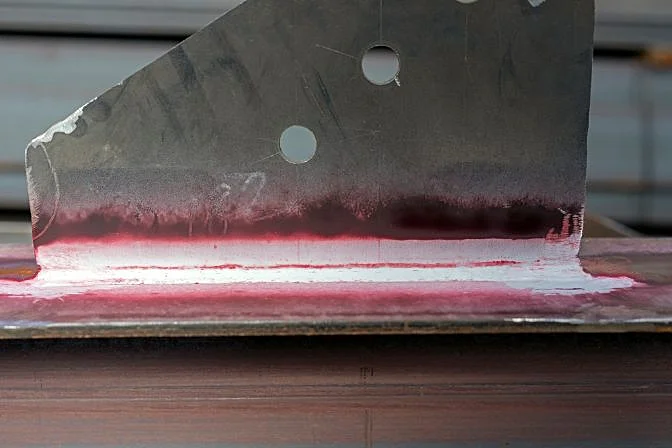
4. Apply Developer
5. Inspection
6. Clean the Surface
Choosing Penetrants, Removers, and Developers
Dye Penetrant Standards and Codes
ASTM (American Society for Testing and Materials)
ISO (International Organization for Standardization)
CEN (European Committee for Standardization)